August 11, 2011

Recipe I love

I've been obsessed with the website Skinny Taste. I started looking for recipes on there when I started Weight Watchers in 2009. I stopped doing WW when I lost all the weight I wanted but the food is always so yummy. :) I have been IN LOVE with this sandwich and salad I've been making lately that I found on the website. It's very simple to make and I made a few changes.


Prosciutto, Arugula and Balsamic Sandwich
Gina's Skinny Recipes

Servings: 1 • Serving Size: 1 sandwich • Old Points: 6 pts • Points+: 7 pts
Calories: 289.8 • Fat: 6.8 g Carb: 40.8 g Fiber: 1.7 g Protein: 10.8 g
 
  • 3 oz french bread or baguette
  • 2/3 cup baby arugula
  • .75 oz imported prosciutto (fat trimmed)
  • 2 tsp balsamic vinegar
  • 1 tsp extra virgin olive oil
  • fresh cracked pepper

Whisk together balsamic and oil. Cut bread, top with arugula, prosciutto and top with balsamic, oil and fresh cracked pepper.

My changes: 
  • Instead of using prosciutto I used 2 or 3 slices of ham. Prosciutto can be expensive. I tried it last week with it and decided this week to just use ham. It's still delicious. :)
  • Instead of using french bread I bought a whole grain baguette at Kroger and cut it up into four pieces. I froze the pieces I didn't use and warm them up in the microwave when it's time to eat.
  • Instead of using arugula I use spring mix. Arugula is too spicy for me and it's not my favorite.

This was my lunch. I already took two bites out of my sandwich because I was STARVING. 

 I also made a yummy fruit salad. :) I bought a personal watermelon and it was so cute.


Strawberries & Bananers,
Katie :)

July 31, 2011

My Favorite Nail Polishes! :)

I've been on a nail polish kick for a while. I always have to have my nails painted. These are my ALL TIME favorite nail polishes. :)

Name of the polishes from left to right.  (Fairy Dust, Ballet Slippers, Knockout Pout)
 
Last 3 nail polishes in the bunch. (Nude Beach, Topless & Barefoot, Hi Maintenance)
I'm really into having a accent nail and I usually paint my ring fingers with this awesome China Glaze nail polish. I paint all my nails the same color and then paint a coat of this on top of my ring finger. 
Nude Beach: I don't know if you can really tell by this picture but this is a light pink with some shimmer in it. I also like using this as an accent nail color and I use it with light pink colors.
Topless & Barefoot: This is one of my FAVORITE summer colors. I've worn this a lot this summer. My friend got me the gold polish on my accent nail for my birthday and I love the combination. 
Knockout Pout: This is a picture from my cell phone so it's not not very good quality. This color is almost a NEON pink and I love it. I have it on my toes right now. :) Of course on my accent nail is Fairy Dust by China Glaze.

I mentioned Ballet Slippers in my last post on nail polishes.It is my all time favorite polish. If I can't decide on a polish then I usually choose this. Ballet Slippers and Hi Maintenance are both light pink polishes. I love them both. If you want to check out more colors by Essie you can visit their website:  Essie's Website

You can find Essie nail polishes at Ulta, Target and other drugstores. You can even go on their website to find where they are sold around you. I found the China Glaze nail polish at Sally Beauty Supplies. I don't love China Glaze polishes but I do love this one. :)

Enjoy!!

<33 Cotton Balls & Acetone,
Katie

July 19, 2011

How to: At Home Manicure

I have had a lot of people compliment me on my nails lately and they are surprised that I do them myself. I have been blessed with good nail beds...not gonna lie. They are really long so my nails look longer then they really are. Here is the way that I do my nails. I ALWAYS have nail polish on my nails and feel naked without it. I enjoy doing this and it takes me about an hour to do start to finish. I will tell you the products I use, their prices and where I bought them (by clicking the link under the pictures). 

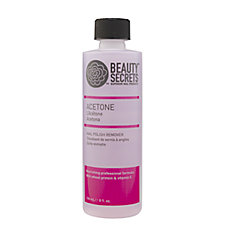
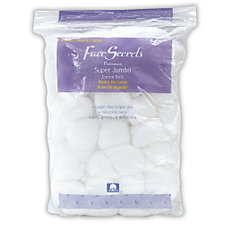
  1. I start with removing my previous nail polish with PURE acetone. You can find this at Sally Beauty Supply (or at least I did). I use super jumbo cotton balls to take off my polish too. 
Nail Polish Remover

Cotton Balls
 2. If my cuticles look really bad then I will soak my hand in a bowl of warm water. I will then VERY carefully cut off my cuticles with a cuticle cutter. Be very careful with this it. I cut off any hang nails or any cuticle that looks ridiculous. Make sure the skin at your cuticle is an even curve.

 
Revlon Cuticle Clipper

  3. I then take my nail file and file my nail. I either do a square shaped nail or an oval shape. When I file my nail I try to go in the same direction the whole time. Don't go back and forth but if you do then it's okay (try not to though). Filing in one direction will help your nails not to peel (not your polish, your nails). Apply gentle pressure until you get the shape you desire. Try to file your nails so they are all the same length. It's a big pet peeve of mine when people have different length nails. In my opinion it looks the best when they are the same length.


I use two Tropical Shine nail files that are both found at Sally Beauty. One is supposed to be used on artificial nails but I use it on my normal nails and it seems to be fine.This file is called Zebra 180. I also have one for natural nails. This one is called Fine 400/600. I have used many of these nail files and love them.
  4. Next I buff my nails with a buffer. I use this tool on every nail and go back and forth. This gets the ridges out of your nails and makes them smooth. It will also get rid of any peeling that you have on your nails.
They sell these in single blocks for about $.99 cents at Sally Beauty. The link I've found is a set of 10. Of course you don't need to buy a whole set.
 5. Now that you have your nail polish off, cuticles looking fabulous, nails filed down and buffed out, it's time to wash your hands. This will remove any dust or dirt that has gotten on your nails. Sometimes I wash my hands and then use another cotton ball with acetone and rub that on my nails too.

  6. It's now time to get ready to paint your nails. I always put down a small towel so I don't get any polish on the table (I never do but it's just incase). I now take out the nail polish I will use, my base coat, top coat and  nail care sticks (for any mistakes).

    Nail Polish: The nail polishes I use are mainly Essie. You can find them basically anywhere now. I've seen them at Target, Ulta, CVS, Walgreens and Kroger. I usually buy them at Ulta or Target. They are around $8 depending on where you buy it. If I'm not using Essie I'm using OPI or China Glaze. But most of the time I'm using Essie. I find that these nail polishes work the best. They don't crack or peel when you JUST put them on. I hate when I paint my nails and two days later they are already peeling off.
Essie Ballet Slippers (my favvv)

    Base Coat: Using a good base coat will help your nail polish stay on longer and to not dye your nails. Have you ever used a very pigmented color and when you take your nail polish off your nails are dyed that color? That happened once when I used a dark blue. It wasn't pretty. I learned my lesson. There are some colors that you can't completely get off but you can just keep using your acetone to get them off. I use OPI base coat. Also, you can find this anywhere.
I can't find a direct link to some place where you can buy this but I've bought mine at Target and Ulta. It is usually $8.50. You can buy it online at drugstore.com.
    Top Coat: I have tried many different types of top coat but I've found Seche Vite to be my favorite. It's thick and makes your nails look very shiny. I love this top coat so much that I'm on my second bottle.

 
Seche Vite Dry Fast Top Coat
    Nail Care Sticks: I use these little sticks if I get any nail polish on my skin. I gently and carefully rub either tip to remove the nail polish that I got on my skin.
Trim Nail Care Tools

  7. Now that we have all of the bases covered we can start painting our nails. I like painting my nails in natural light during the day because I can see better but I will paint them at night just do it in a well lit room. I loosen each top of the nail polishes before I start painting my nails in case one of them gets stuck I don't mess up my nails. I start buy applying one coat of base coat to each nail. I then let that dry for about a minute and set aside.

Next, I start panting my nails. This takes practice and go slow. The lighter the color you use the less likely you'll see the mistakes. Apply one coat to each nail and then let your nails dry for 2-3 minutes. After the 2-3 minutes are up apply another coat of nail polish. With most nail polishes you'll need to apply two coats if you apply more then two coats it starts to get goopy and takes a LOOOONGGG time to dry. I then let my nails dry for 2-3 minutes again.

Finally I apply top coat. I apply one coat of top coat to each nail and let my nails dry for about 30 minutes. Do not move. Do not touch anything. Don't even think about cooking dinner or doing laundry. I always get up getting hungry when I'm waiting for my nails to dry OR I have to go to the bathroom. SOOO eat a snack before you do your nails and go to the bathroom while you're washing your hands. To make sure my nails are dry I slightly touch them to see. Be careful for another half hour and they should be dry. If my nails DO get messed up I try moving the polish gently back into place. My nails aren't always perfect and if one nail gets messed up I'll get over it. You can also buy a nail polish remover where you just stick your finger in the container so you can redo one nail.

I hope this makes your at home manicure look good and last a while. I enjoy painting my nails so I don't mind repainting them within a week. If your polish does start chipping then take it off. Chipped nail polish looks tacky and unprofessional (even though I've done it a few times, I try not to). This does take practice so start off with lighter colors and gradually build up to darker colors.

Enjoy.

<333 Katie

July 17, 2011

Natural Look Using The Naked Palette


Products Used: 
Urban Decay Naked Palette 
Urban Decay Primer Potion in EdenUrban Decay 24-7 eyeliner in Whiskey 
MAC Paintpot in Painterly
L'oreal Voluminous Mascara in Carbon Black
Revlon Eyelash Curler
Sigma Makeup Brushes

Apply a tiny amount of Urban Decay Primer Potion. You can use any primer of your choice or you don't have to use it at all.
Next, you are going to apply Mac Painterly Paint Pot on your entire lid using the Sigma E25 blending brush. This will cover up any veins that show through your eye lids. You can use concealer too but your eyeshadow is more likely to crease with concealer.


Next, I used my Sigma E55 Eye Shading brush and applied Sin from the Naked Palette to my lid.


Next, I used my Sigma E40 Tapered Blending Brush to apply Naked from the Naked Palette. I applied this shadow to my crease and blended using windshield wiper motions (from the left corner of my eye to the inner corner but NOT all the way in).

Then, I use the same Sigma Brush and above and apply a small amount of the shadow Buck to the left half of my crease. Don't go all the way in, only half way, using the same windshield wiper motions.
Then, I use my E30 Pencil Brush from Sigma Brushes and apply a small amount of the color Buck to my lower and upper lash line.

I know I look scary in this picture, ha!! If you need to, you can blend out the color on your lower lash line with your ring finger.

Then, apply Buck to your upper lash line.

I then take the color Virgin and apply it to the inner corner of my eye and my brow bone using the Sigma E70 Medium Angled Shading Brush.

No, I'm NOT naked. I'm wearing my towel. :)
Next, I used my Urban Decay eyeliner in Whiskey and lined my eye.

Next, I curled my lashes and applied mascara to my upper and lower lashes.

The easiest way for me to apply mascara to my lower lashes, without getting mascara every where, is to look down like this. :)
All done. Now you have your finished look. :) I hope you like it because it's one of my favorite eye shadow looks these days.


July 14, 2011

How to: Cover Under Eye Circles

Just admit it, we all have under eye circles. I know I do. Some are worse than others but these helpful tricks and tips will help you cover them. I found my two favorite under eye concealers and they are both from the drugstore. :) I've tried high end concealers but I found that these two work best.

I use Covergirl & Olay Simply Ageless Eye Concealer and Garnier Skin-Renew Anti-Dark Circle Eye Roller.

This is the Covergirl & Olay Simply Ageless Eye Concealer. I use the Light 210 shade and it matches perfectly. They have a wide range of colors to match everyone's skin tone. You blend the concealer and the white part together and it becomes smooth. I don't care if you're supposed to be old to use this but I'm 21 and love it!! This concealer is $12.99 at CVS.


This is the Garnier Skin-Renew Anti Dark Circle Roller. This roller has caffeine in it to depuff your eyes. It goes on cool and feels really good. This is a tinted roller so the color is very light. If you have a darker complexion this won't work well for you (sorry). This concealer is $12.99 at CVS.
Application

I apply my under eye concealer after I have applied my foundation and set it with powder. I don't like setting my concealer with powder because I found that it creases more but it's your preference. When applying concealer always use your ring finger since it applies the lightest pressure. You don't want to irritate your eyes so never ever rub or SCRUB your eye makeup off. You have to be very gentle. Also, always dab your concealer NEVER rub back and forth (it will look streaky and that's not cute). 
Take whichever concealer you will be using and pat it under your eye. Dab from left to right (or right to left) while looking up. Make sure to get under your lower eye lashes. Remember to dab and never rub back and forth. Also, dab into the inner corner of your eye.After you have done this use the rest of the concealer on your finger and go in a triangle motion (below). If you need to apply more concealer go ahead just don't make it look caked on. Applying your concealer in a triangle motion will even out any shadows and create a flat canvas for the rest of your makeup. I learned this fun trick (to go in a triangle) from Kandee Johnson. I saw this on one of her youtube videos and have done it ever since. Go ahead and try it. :) You'll look more alive and awake in no time.


I hope this helps you hide your under eye circles. Let me know if you try this and if it works for you. :) Also, if you have any under eye concealing tips and tricks share them with me. 


Fun Quote of the Day:
"Do I love you because you're beautiful, Or are you beautiful because I love you?"
~Richard Rodgers and Oscar Hammerstein II, Cinderella

July 13, 2011

First Beauty Rave!

I recently went to Bath and Body Works and smelt almost everything in the store. They were having a big sale and I was telling myself I had to buy something. I soon found their summer scents section. If there is ANYTHING that smells like coconut I love it. :) This is when I came across this amazing collection. I had to pick up the lotion, body wash and body spray. I've used them every day since I bought them and LOVE them. The smell lasts all day and I smell yummy. Online they have more then they had in store. I'm tempted to buy the body scrub. They also have Coconut Pineapple and Coconut Passionfruit.They 50% off so go grab some at your Bath and Body Works before they are all gone!!!