- I start with removing my previous nail polish with PURE acetone. You can find this at Sally Beauty Supply (or at least I did). I use super jumbo cotton balls to take off my polish too.
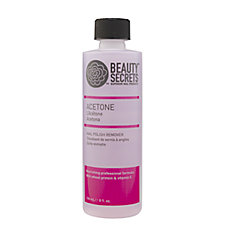 | |||||
| Nail Polish Remover |
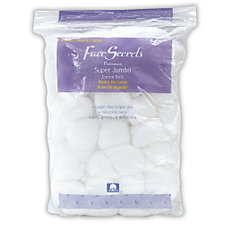 |
| Cotton Balls |
 | ||||
| Revlon Cuticle Clipper |
3. I then take my nail file and file my nail. I either do a square shaped nail or an oval shape. When I file my nail I try to go in the same direction the whole time. Don't go back and forth but if you do then it's okay (try not to though). Filing in one direction will help your nails not to peel (not your polish, your nails). Apply gentle pressure until you get the shape you desire. Try to file your nails so they are all the same length. It's a big pet peeve of mine when people have different length nails. In my opinion it looks the best when they are the same length.
 | ||
| I use two Tropical Shine nail files that are both found at Sally Beauty. One is supposed to be used on artificial nails but I use it on my normal nails and it seems to be fine.This file is called Zebra 180. I also have one for natural nails. This one is called Fine 400/600. I have used many of these nail files and love them. |
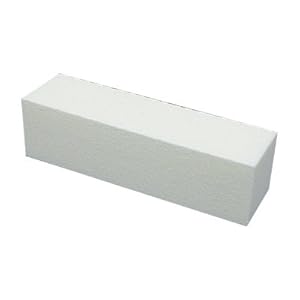 | ||||
| They sell these in single blocks for about $.99 cents at Sally Beauty. The link I've found is a set of 10. Of course you don't need to buy a whole set. |
6. It's now time to get ready to paint your nails. I always put down a small towel so I don't get any polish on the table (I never do but it's just incase). I now take out the nail polish I will use, my base coat, top coat and nail care sticks (for any mistakes).
Nail Polish: The nail polishes I use are mainly Essie. You can find them basically anywhere now. I've seen them at Target, Ulta, CVS, Walgreens and Kroger. I usually buy them at Ulta or Target. They are around $8 depending on where you buy it. If I'm not using Essie I'm using OPI or China Glaze. But most of the time I'm using Essie. I find that these nail polishes work the best. They don't crack or peel when you JUST put them on. I hate when I paint my nails and two days later they are already peeling off.
 |
| Essie Ballet Slippers (my favvv) |
Base Coat: Using a good base coat will help your nail polish stay on longer and to not dye your nails. Have you ever used a very pigmented color and when you take your nail polish off your nails are dyed that color? That happened once when I used a dark blue. It wasn't pretty. I learned my lesson. There are some colors that you can't completely get off but you can just keep using your acetone to get them off. I use OPI base coat. Also, you can find this anywhere.
 | ||
| I can't find a direct link to some place where you can buy this but I've bought mine at Target and Ulta. It is usually $8.50. You can buy it online at drugstore.com. |
 | ||
| Seche Vite Dry Fast Top Coat |
 | |
| Trim Nail Care Tools |
7. Now that we have all of the bases covered we can start painting our nails. I like painting my nails in natural light during the day because I can see better but I will paint them at night just do it in a well lit room. I loosen each top of the nail polishes before I start painting my nails in case one of them gets stuck I don't mess up my nails. I start buy applying one coat of base coat to each nail. I then let that dry for about a minute and set aside.
Next, I start panting my nails. This takes practice and go slow. The lighter the color you use the less likely you'll see the mistakes. Apply one coat to each nail and then let your nails dry for 2-3 minutes. After the 2-3 minutes are up apply another coat of nail polish. With most nail polishes you'll need to apply two coats if you apply more then two coats it starts to get goopy and takes a LOOOONGGG time to dry. I then let my nails dry for 2-3 minutes again.
Finally I apply top coat. I apply one coat of top coat to each nail and let my nails dry for about 30 minutes. Do not move. Do not touch anything. Don't even think about cooking dinner or doing laundry. I always get up getting hungry when I'm waiting for my nails to dry OR I have to go to the bathroom. SOOO eat a snack before you do your nails and go to the bathroom while you're washing your hands. To make sure my nails are dry I slightly touch them to see. Be careful for another half hour and they should be dry. If my nails DO get messed up I try moving the polish gently back into place. My nails aren't always perfect and if one nail gets messed up I'll get over it. You can also buy a nail polish remover where you just stick your finger in the container so you can redo one nail.
I hope this makes your at home manicure look good and last a while. I enjoy painting my nails so I don't mind repainting them within a week. If your polish does start chipping then take it off. Chipped nail polish looks tacky and unprofessional (even though I've done it a few times, I try not to). This does take practice so start off with lighter colors and gradually build up to darker colors.
Enjoy.
<333 Katie
I do my nails at home too and use a lot of the same products! I like to use solar oil on my cuticles every day to keep them hydrated. I also wrap a cotton ball around a wooden stick and dip it in polish remover to get mistakes on my skin. Nice blog!
ReplyDeleteWhere did you buy solar oil at? I have a cuticle oil but I don't like it so I stopped using it.
ReplyDeleteI'm pretty sure they have it at CVS and beauty stores.
ReplyDelete